How to Create Viral “Masoon” Color Grading in CapCut for Instagram Reels
In today’s tutorial, I’m going to show you how you can achieve the Masoon-style color grading effect on your videos using the CapCut application. This style is currently trending on Instagram Reels and is known for its cinematic, dark-toned look with beautifully enhanced greens and blues. Follow along until the end, because I’ll take you step-by-step through the entire process.
Step 1: Install and Prepare CapCut
First, make sure you have the CapCut application installed on your device. If it’s not available in your region, you may need to connect to a VPN before downloading. Simply open any VPN app, click “Connect,” and you’ll be ready to use CapCut without restrictions.
Step 2: Import Your Video
Open CapCut and click on the New Project button. Select the video you want to edit and tap Add. The video will now appear in your editing timeline.
Tip: Filming in a good location makes a big difference! Even with great editing skills, a poorly recorded video won’t look professional. Choose locations with a mix of sky, greenery, and open space for the best results.
Step 3: Remove the CapCut Ending Watermark
Scroll to the end of your video in the timeline, tap on the CapCut ending clip, and delete it. This will give your final video a clean and professional look.
Step 4: Start with Dark Tone Conversion
To achieve the Masoon style, we first need to turn the video into a darker, cinematic tone.
- Tap on your video clip and scroll to find the Adjust option.
- Lower the Brilliance setting. This softens harsh lighting and creates a smoother, less glaring appearance.
- If your video looks too dark after this step, slightly increase the Brightness to balance it.
Step 5: Adjust Highlights and Shadows Using Curves
Scroll to the Highlights and Shadows settings. Instead of adjusting them manually, it’s better to use the Curves graph:
- Open the Curves tool.
- Add points on the graph by tapping along the line.
- Lower the lower-left point for deeper shadows.
- Raise the upper-right point for brighter highlights.
This creates a perfect balance between light and dark areas, enhancing the cinematic mood.
Step 6: Apply Masoon-Style Temperature and Saturation
Now comes the signature part of the effect — the cool-toned Masoon look:
- Go to Temperature and slightly lower it to introduce a bluish tint.
- Increase Saturation to make the colors pop.
- Adjust Contrast for more depth.
Step 7: Enhance Greens and Blues
Masoon videos are known for their dark, rich greens and enhanced blues. To replicate this:
- In the Curves tool, switch to the Green channel and add a middle point. Raise it slightly to enrich green tones.
- Switch to the Blue channel and do the same to intensify blues.
Be careful not to overdo this — subtlety keeps it professional.
Step 8: Use HSL for Color Precision
The HSL (Hue, Saturation, Lightness) tool gives you even more control:
- Select Green and decrease Lightness to make it darker.
- Increase Saturation for vibrancy.
- If needed, shift the hue slightly toward yellow or blue depending on your preference.
- Do the same for Blues in the sky for a balanced tone.
Step 9: Optional — Apply Filters
If you want to enhance the look further, explore CapCut’s filter library:
- Go to the Filters section.
- Try filters under the Movie category, such as “Green Orange,” for a cinematic vibe.
- Combine filters with your manual adjustments for a more refined look.
Step 10: Add the “Magic” Effect
To make your video stand out even more, you can add a background blur effect:
- Go to Video Effects → Lens category.
- Select Spot Blur and apply it to the entire video.
- Reduce the intensity so the effect looks natural and not overdone.
This will make your subject stand out while keeping the background soft and smooth.
Step 11: Export in High Quality
Once you’re happy with the result, set all export quality options to maximum and click Export. Your professionally color-graded video will now be saved to your device.
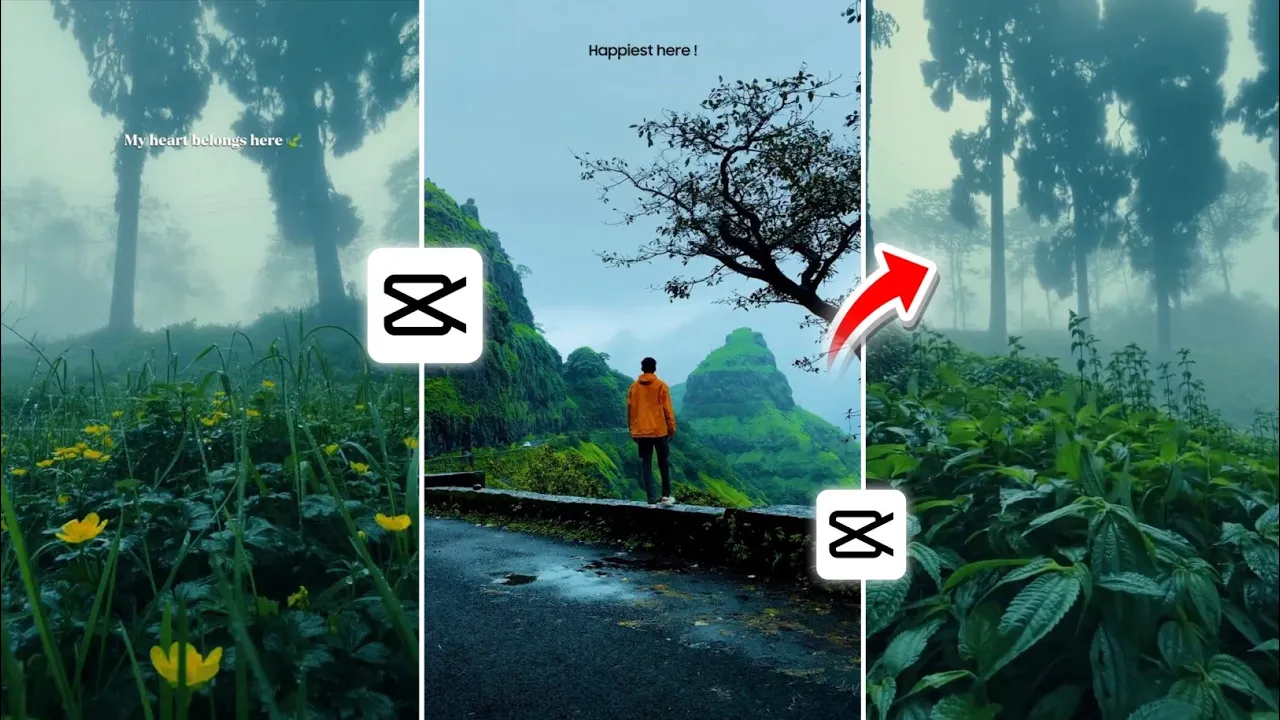
Before & After
Here’s what a typical transformation looks like:
- Before: Standard footage with flat lighting.
- After: Rich Masoon tones, balanced shadows/highlights, and cinematic greens and blues.
Why Masoon Color Grading Works So Well on Instagram Reels
This style is trending because it creates a dreamy, cinematic look that’s visually pleasing and scroll-stopping. On platforms like Instagram and TikTok, eye-catching visuals are key to increasing engagement.
Tools & Resources
- Download CapCut
- Free VPN Apps
- Instagram Reels Inspiration
- Adobe Premiere Pro (for advanced color grading)
Final Thoughts
With just a few adjustments in CapCut, you can turn ordinary videos into stunning, cinematic masterpieces. The Masoon color grading effect works especially well for travel, lifestyle, and fashion content — but feel free to experiment and make it your own.
Try these steps today, and watch your Instagram Reels or YouTube Shorts engagement skyrocket!