How to Create Stunning 4K HDR CC Quality Videos in Alight Motion
Are you looking to take your mobile video editing skills to the next level? In this guide, I’ll walk you through the complete process of creating professional-looking 4K HDR CC quality videos using the Alight Motion app. Whether you’re making Instagram Reels, YouTube Shorts, or TikTok videos, this step-by-step tutorial will help you achieve cinematic results.
What You’ll Need
- Alight Motion App – Download it from the Google Play Store.
- A video clip you want to edit.
- Optional: Wink App for pre-enhancing video quality with AI.
Step 1: Setting Up Your Project
- Open Alight Motion and click the Plus (+) button to create a new project.
- Select your video ratio (for Reels and Shorts, use 9:16).
- Tap Create Project and your workspace will be ready.
- Add your video by clicking the Plus (+) icon again, selecting Media, and choosing the clip from your gallery.
At this point, your video is still in its original form without any HDR effects applied.
Step 2: Adding the HDR Effect
To transform your normal video into 4K HDR CC quality, follow these steps:
- Click the Plus (+) icon and add a Rectangle shape.
- Tap the three dots menu and select Fill Composition Area to cover the entire screen.
- Go to Blending & Opacity, select Difference mode, then choose Subtract.
- Now, click Add Effect and apply the following effects in order:
- Copy Background – Standard settings.
- Gaussian Blur – Standard settings.
- Gamma & Exposure – Standard settings.
Step 3: Adjusting HDR Settings
Within the Gamma & Exposure effect:
- Lower the Exposure slightly to balance brightness without losing HDR depth.
- Adjust the Gamma to increase or decrease contrast based on your video’s needs.
- Tweak the Offset for fine control.
You can also fine-tune Gaussian Blur intensity to increase or soften the HDR look. Avoid setting it too high as it can over-soften your footage.
Step 4: Adding a White Overlay for Extra Brightness
- Add another Rectangle, fill the composition area, and set its color to pure white.
- Change the blending mode to Overlay in Blending & Opacity.
- If the brightness is too strong, lower the opacity for a balanced look.
Step 5: Optional Enhancements
To make your footage even more visually appealing, consider adding:
- Saturation – Boosts overall color vibrancy.
- Vibrance – Enhances muted tones without oversaturating.
- Temperature – Adjust to create warm or cool tones.
- Sharpen – Apply lightly to make details pop.
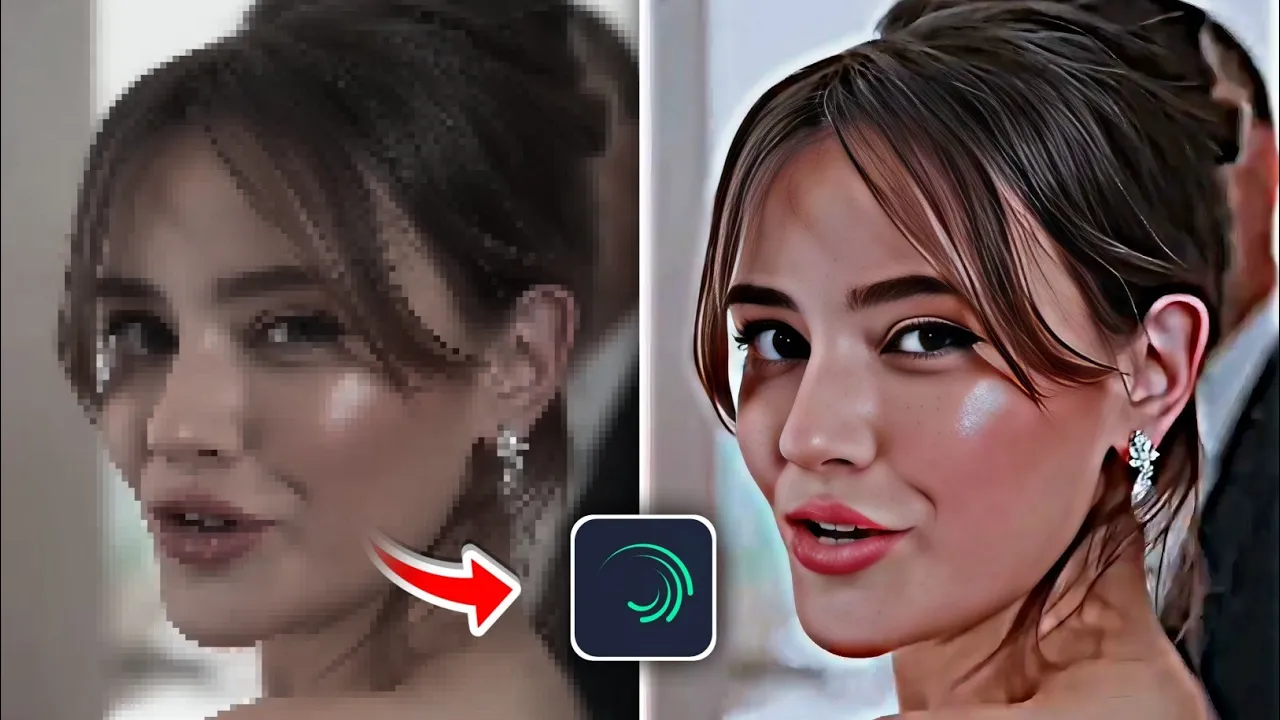
Bonus Trick: Use the Wink App for AI Quality Boost
Before editing in Alight Motion, you can use the Wink App to pre-enhance your video quality with AI. This process smooths out faces, increases clarity, and improves overall sharpness, resulting in a better HDR output.
- Open Wink App and tap Image/Video Quality.
- Click Try Now and select your video.
- Tap Start to let the AI enhance it.
- Once processed, save the video and import it into Alight Motion for editing.
Step 6: Exporting Your Final Video
Once you’re happy with the results:
- Tap Export in Alight Motion.
- Select 4K quality (or the maximum supported by your device).
- Save it to your gallery and share on Instagram, TikTok, or YouTube.
Before and After
The difference between a standard video and an HDR-enhanced one is night and day. You’ll notice richer colors, deeper contrast, and a more cinematic look that grabs attention instantly.
Final Thoughts
Using this method, you can turn any ordinary clip into a professional-looking 4K HDR masterpiece right from your phone. With the right adjustments and a bit of experimentation, you’ll consistently create videos that stand out online.
For more mobile editing resources, check out: