How to Turn a Normal Video into a Stunning Cinematic Masterpiece in CapCut
Creating cinematic videos no longer requires expensive cameras, advanced editing software, or years of filmmaking experience. Thanks to modern mobile apps like CapCut, you can transform an ordinary video into a professional-looking cinematic clip right from your phone. In this guide, I’ll walk you through the complete process, step-by-step, so you can achieve that dreamy, high-quality film look without spending a dime.
Why Cinematic Videos Stand Out
Cinematic videos have a certain magic — rich colors, beautiful lighting, smooth contrasts, and a polished aesthetic that instantly grabs attention. Whether you’re making content for Instagram Reels, TikTok, or YouTube, this style can dramatically increase engagement and make your videos feel more premium.
What You’ll Need
- CapCut App: Available on both Android and iOS. You can download it from Google Play or the App Store.
- VPN App (if needed): Some regions require a VPN to access CapCut’s latest features. Free VPNs are available on the Play Store.
- Your Video: Any regular video clip you want to enhance.
Step 1: Install and Set Up CapCut
If you don’t already have CapCut installed, download it from the link above. If you face access issues, use a VPN app — open it, connect to a server, and then launch CapCut. Once inside, tap “New Project” and select the video you want to edit. Remove the default CapCut watermark if you prefer a clean look.
Step 2: Apply the Perfect Filter
The key to a cinematic transformation lies in the right filter. Here’s how:
- Select your video and scroll until you find the Adjust or Filter option.
- Explore various cinematic filters — look for ones that add warmth, depth, and a film-like tone.
- Popular options include Green-Orange, vintage styles, or teal-and-orange color schemes that give a professional vibe.
- Adjust the filter’s intensity — often, keeping it around 50-70% looks more natural than using full strength.
Pro Tip: If a filter doesn’t load or apply properly, refresh the app and try again. CapCut occasionally experiences minor filter glitches.
Step 3: Fine-Tune with Adjustments
Filters alone can’t deliver a true cinematic feel — manual adjustments bring out the magic:
- Saturation: Slightly increase to make colors pop.
- Brightness: Adjust based on your clip’s lighting — too much can wash it out.
- Brilliance & Contrast: Lower brilliance for a soft, filmic mood; adjust contrast for depth.
- Sharpness & Clarity: Increase slightly for a crisp image, but avoid over-sharpening.
- Temperature: Add a warm tone (yellow) for a cozy, golden-hour feel or a cooler tone (blue) for a dramatic mood.
- Shadows: Lower them for more drama, raise them for a lighter mood.
Step 4: Advanced Color Grading (HSL & Curves)
If you want total control over your video’s look:
- Open the Graph/Curve tool and experiment with adjusting specific colors — for example, deepen greens for lush landscapes.
- Use the HSL (Hue, Saturation, Lightness) settings to target and tweak each color individually.
- Shift hues for creative effects, like turning regular greens into teal for that blockbuster movie vibe.
Step 5: Add a Dreamy Glow Effect
One of the easiest ways to make your video feel cinematic is by adding a subtle glow:
- Go to Video Effects → Light section.
- Select the Dreamy Glow effect.
- Adjust glow intensity — keep it low for a natural look.
- Set the range and fade for softness, and choose a suitable color (white or golden tones work great).
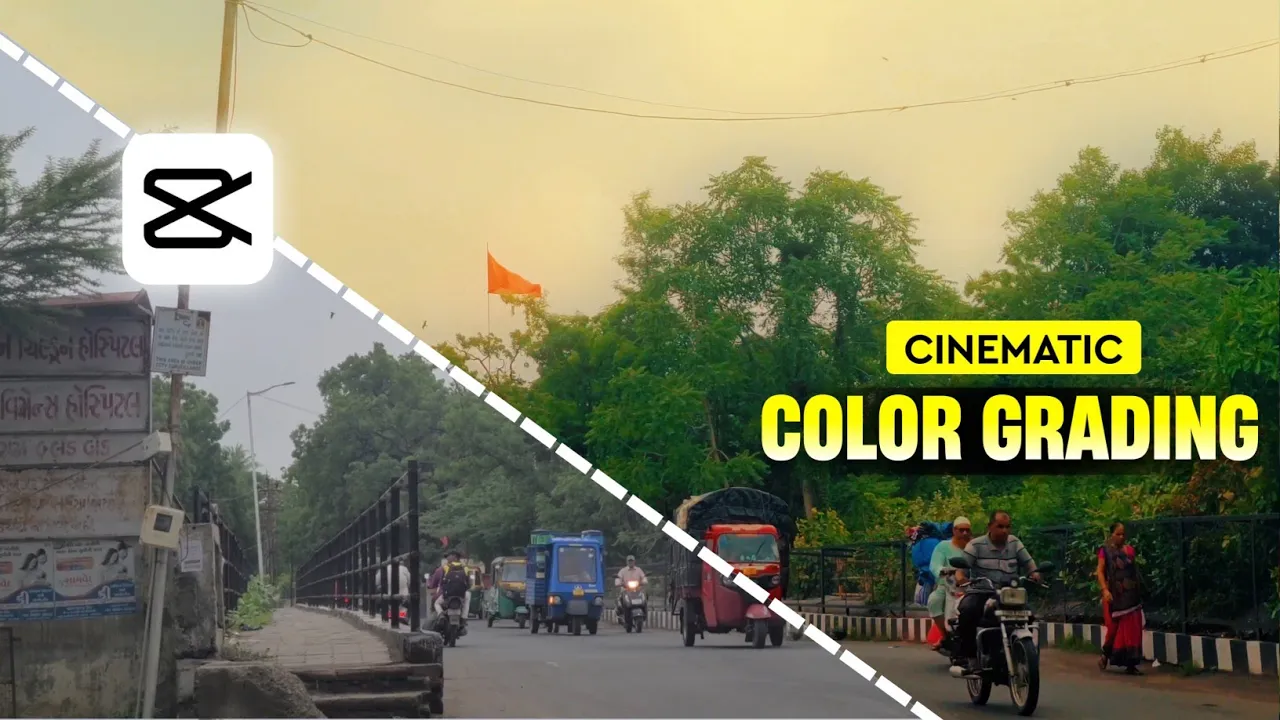
Step 6: Review the Before & After
Once you’ve applied your edits, compare the original video to the edited version. The difference should be night and day — richer colors, cinematic contrast, and a polished, professional finish.
Step 7: Export in High Quality
When you’re satisfied with the results:
- Tap Export.
- Set resolution and frame rate to the highest possible settings for your device.
- Save to your device and share it across your social media platforms.
Bonus Tips for Cinematic Videos
- Shoot videos in good lighting for the best editing results.
- Use a tripod or stabilizer for smooth shots.
- Pair your video with cinematic background music from royalty-free sources like Pixabay Music or Epidemic Sound.
Final Thoughts
With just a few tweaks inside CapCut, you can transform an everyday clip into a breathtaking cinematic masterpiece. Whether you’re a content creator, filmmaker, or simply someone who loves making beautiful videos, this method is quick, free, and extremely effective. So, grab your phone, open CapCut, and start experimenting — you might be surprised at the magic you can create in just a few minutes.
For more video editing tips and tricks, check out the official CapCut website and join creative communities on Reddit or Telegram groups where editors share their favorite filters and presets.